Saturday 3 December 2016

Friday 2 December 2016

Animation Test Links

Test 1:

https://drive.google.com/open?id=0Bw2VLkLmIaaJaEN6T1I2bGJVazQ

Test 2:

https://drive.google.com/open?id=0Bw2VLkLmIaaJV2FfNUp5YjRxNDg

Test 3:

https://drive.google.com/file/d/0Bw2VLkLmIaaJVUNCM3hkQWNmNWc/view?usp=sharing

Test 4:

https://drive.google.com/open?id=0Bw2VLkLmIaaJQU44YTRIUDY3Y2c

Test 5:

https://drive.google.com/open?id=0Bw2VLkLmIaaJa0RnUGJoMWlGWE0
Share:

Outlander Case Study: EP9 Podcast


  • Voiceover introduction opens episode, showing audience it's being told from Jamie's perspective. The first half of season one was Claire's perspective book the book focuses not only on claire but also on Jamie. Producer wanted to give a sense/introduce Jamie's mindset. Was considered that it would be too disruptive/confusing to the and so was removed until post-production where it was added back in because it really "worked" to show both sides of the story being told.
  • Audio was changed slightly in intro to make it more masculine. Lower-toned instruments such as cellos were used to subtly give you the idea this ep is Jamies POV.
  • Title scene shows Jamie putting his kilt on which echoes episode one where Claire is dressed by Mrs Fitz
  • In book, Jamie breaking into fort William is told from Claire's perspective, this was changed in the tv show. For a more effective visual narrative, the break in is shot from Jamie's perspective. The audience already knows claire is being assaulted by Captain Randall. This use of dramatic Irony puts the audience on the edge of their seat as while we know Claire is beingassaultedd Jamie does not (the narrative is known to the audience but not the central character.) This creates tension as the full significance and importance of Jamie's rescue of Claire is the full focus of the audience as they are rooting for Jamie to arrive in time to save Claire. They fear he will be late as he does not know the full importance riding on his rescue.  
  • A lot of the emotion is scenes is oven shown through facial expression and posture
  • The majority of the show is shot on location in Scotland. Makes the scene realistic and this decision grounds the fantasy in reality like in Tolkien's work. 
  • Iteration gives choices in post-production. They talk about, in the podcast, how for important scenes they spend the whole day filming the one scene so the actors could perform the scene in a wide variety of different ways. This is so there was a lot of choice for shots/angles/variations of action ect when the scene was cut together in post production. This was done so the important scenes could be put together in a way that best portrayed the narrative and more choice allowed for post production to create a better final scene as "you never know until you're in the editing room what works and what doesn't" "sometimes the unexpected works better whilst what was scripted doesn't work at all". This idea can be taken into concept art in the sense that more iteration is likely to produce a better final result.
  • Say most sweeping shots are best done at the end of te day because then you know what the key shots are - the areas that were most important to the narrative and characters. This idea can be taken into concept art - don't produce final images until you know the plot/characters/important aspects or you will just waste your time and have to redraw stuff.
Share:

Tuesday 29 November 2016

Updated Yari Concept

Updated since I've been drawing Yari more since the full colour drawing and her character design has developed and changed. Most notable difference is the hair. I initially did a more relaxed hairstyle to give her character more variation but i think the looser hairstyle fits her adventurous personality more.
Share:

Sunday 27 November 2016

360° Panoramic Painting: Case Study

http://www.yogjoshi.com/360-panoramic-painting/

Notes:

  • Everything painted in Photoshop, as a flat image.
  • Panopainter, program used to create 360 image, works with PSD files. Each time Photoshop file saves it will update in Panopainter, means you can keep workflow open in 3D to constantly check image is working.
Artist Example (Flat image, painted in Photoshop):

mountainscape 360_6


Artist Example (Using a grid, found on Panopainter, as guide):

mountainscape 360_6_grid


Grid used (below) set layer to multiply:
grid

Notes (Cont.):
  • To make left and right edges mesh together use offset (filter>other>offset)
  • "For the horizontal value, enter half the size of the width. In this case the width of my painting was 4096 pixels, so half the value would be 2048."
  • Offset has to be applied individually to all layers
My attempt:


Sketched out a simple desert environment to test out this technique of panoramic painting myself, I didn't want to waste time doing a complex drawing for a test in case this didn't work out. I used the program panopainter above. Luckily you can have a document open in panopainter and photoshop at the same time so you can draw in photoshop and it will update in real time in panopainter.

To get the drawing to loop continuously without a seam, I used the offset too in Photoshop to ensure the edges met up:


You have to apply this offset to all the layers for it to work, as you can see, you end up with the middle of the painting so you can work on makng the image seamless. When you are finished you can remove the offset to return the drawing to its normal state - but now the edges will match up.

See Below:

When the image was completed, I exported it as an image file and used a program called Exiftool to change the file types so it will show up as a panoramic file when uploaded on facebook - a platform which supports 360 degree images.

For the image to be supported as a panoramic photograph on facebook it must have the following information:

Make: RICOH
Model: RICOH THETA S
Projection Type: equirectangular

This is the 360 image uploaded to facebook:


I do think this works really well. It has the possibility for making concepts clearer as the image can be viewed in the round. It's really quite immersive and lets the viewer feel like they are inside the image, its also quite fun being able to turn it around and look at an image from different perspectives. The experience being interactive is novel as the viewer feels more involved with the world in the artwork.


Share:

Google Cardboard (VR) Notes + Google Camera Test

Notes from playing with games on Google Cardboard App.

  • Motion Sickness!! (made worse by games you have to move around a lot for - with no central point of focus) (Some headsets have it so you can see the sides of the helmet youre wearing, helps with motion sickness.)
  • Add audio/headphones for immersivity
  • Make sure "line" on phone screen matches up with line in cardboard VR
  • 360 degrees TOO IMMERSIVE (Especially for horror games) Scary.
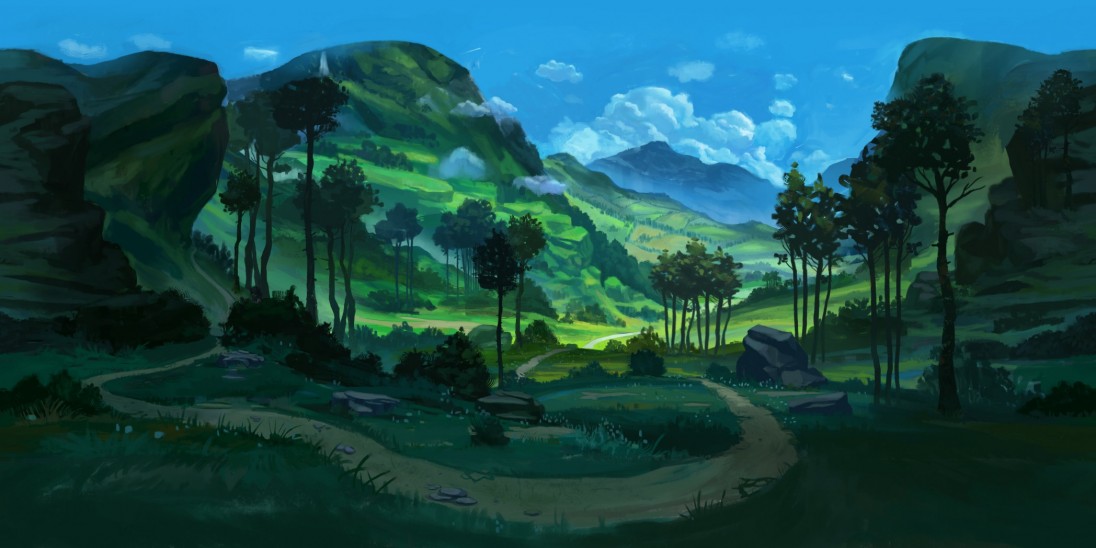
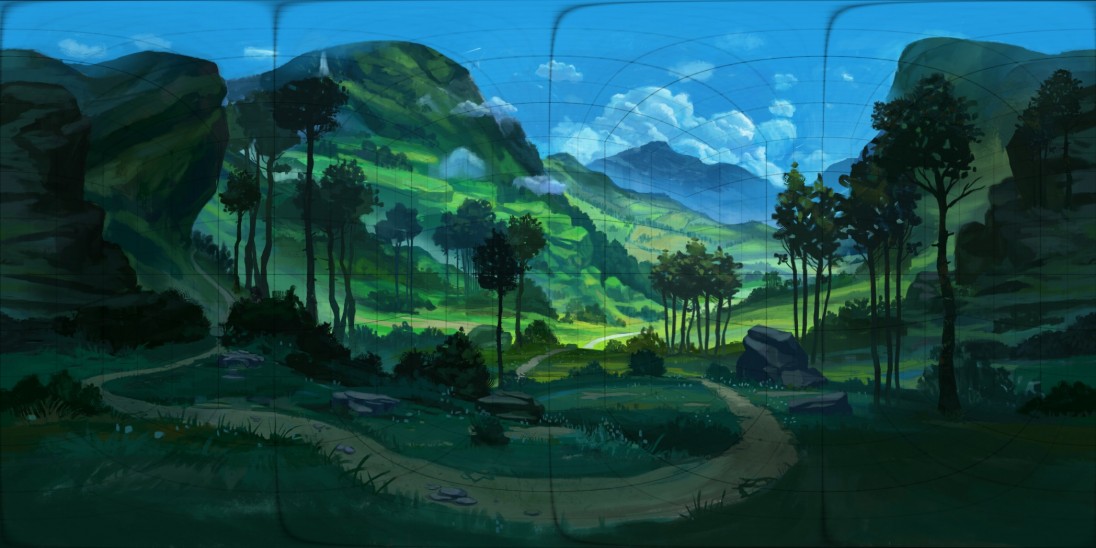
  • Really nice for viewing more arty style games/landscapes/not as bad for feeling sick.
  • Good for viewing art for VR games (better idea of how it could look in 3D)
  • No apps for uploading art, some for panoramic camera photo viewing. 
  • Cardboard Camera: This app allows you to capture a 360 photo, which is basically a panoramic photo that goes all the way around. (Could take panoramic photo of a printed out painting? See if that works.)
  • Cardboard photos are linear, so no looking up or down.
  • PSViewer is a good Cardboard VR app for viewing photospheres, a photosphere is a collection of stitched images that creates a 360 image, like you're looking at the inside of a photographic ball. 
  • Need a phone that fits the gen of google cardboard that you're using.
  • Google Cardboard also favours phones with higher pixel density, higher resolution doesn't make much difference. (Samsung galaxy s6 will work better than an iPhone 6)
  • Your phone needs gyroscope to be able to use the app
  • Need to be running android 4.1 or up
  • Minimal external navigation options, such as controllers, compared to higher end VR
  • Many apps utilise "hover navigation"
  • More expensive/later versions of cardboard VR feature a button on the "VR machine"
  • Android phones have a wider variety of apps for use with Cardboard VR

Google Cardboard test - putting my own work into google Cardboard

There aren't any apps on google cardboard that allow you to put drawings into Google Cardboard in order to turn them into VR. There is an app on Google Cardboard, however, called Google camera which allows you to turn photos into VR. I hoped to use this app to photograph my drawings and turn them into a VR image that could be used using teh google cardboard app and viewer. 

Using the google camera app on google cardboard I did the first test: taking a photo of my own surroundings.

Test 1:

Photo I took using Google Camera is downloadable and viewable through the google camera app through this link: https://vr.google.com/vrphoto/AIJsmdkIYPjHUBtFtkQCTnPL7YTvTSv1kdd09Qk-cekRQ-6SgXaruSIxOH4E

This worked really well. You have to move the camera REALLy slowly when you take the photo though so it took ages to get right. It's actually really effective, it's weird looking at my room in the VR camera because things are in a different place to where they are in real life, it's taken the photo so everythings sun a bit to the right - so when you take the headset off its very bizarre. The only issue is with this app is because it takes a panoramic shot you can't look up or down. 

Test 2: 

Going from taking a panoramic photo, I wanted to see if I could take a panoriamic photo of my own work to view in VR.

Photo I took downloadable/viewable through google cardboard camera app -  link here: https://vr.google.com/vrphoto/AIJsmdmBgWDrUxIcrPlkf8zOPkXoW4h6yjT7aa2Cjg2zPpNU0J-DXgBTq23T

This didn't work very well. I was hoping to just go really slow moving the camera over the drawing and then finishing the panoramic shot early but this only gives a very small shot of an image and the rest of the environment is just blank (see test in cardboard app)

I learnt that that image/drawing i wanted to put in google VR would have to be a full 360 drawing for the app to take an image of the drawing and render it as a VR environment.

Test 3:

Because I realised from the last test that the drawing to be made into VR would have to be a full 360 Image, I tried laying out a really long drawing (just doodled in promarker) to take a panorama of and put into google camera. I thought this would be a really good way of solving the problem. I thought if this worked, I could do a real drawing this long and change it into VR. Unfortunately, when I tried to film this the app told me the image I took would have to be upright and so it wouldn't let me take a photo at all. 


Test 4:

Test Viewable on google camera app, downloadable from this link: https://vr.google.com/vrphoto/AIJsmdmSMJFNy0koRQ6RqRf7bAU5_qn5nkxw_DBENuclMC-1M7v2RjxJetMZ

As a final test, I pinned all the pieces of paper up against a wall so I could film them with my phone upright to see if this long, upright image could get one of my artworks into google cardboard via the google camera app. This did not work either. The gyroscope in the app could sense I was walking sideways to film the image, not round in a circle, so the result viewable through the link is just all the sheets of paper really bunched up in one place, with the rest of the 360 blank.

Conclusion 

In conclusion, I don't think google cardboard is an upcoming way to get artwork viewed in 360 in an industry pipeline. Firstly, the app doesn't work for drawings yet despite that, you'd need to use a steady cam to film the drawing to stop your shaking when you film the artwork which would add extra unnecessary steps and also cost because you'd need to pay for a steady cam to film the artwork. Also, the artwork made would need to be ginormous to get it into VR and this just wouldn't be time effective - it would take way too long. Because of this, I've concluded that Google Cardboard is a great platform if you're developing VR apps that you want to be accessible to a wide audience, however, it's not good for viewing artwork. It's a faff and would definitely not improve the current industry standard concept design process. Because of this, I'm going to look at alternate ways time-based media and Vr could help the concept art pipeline.


Share:

Friday 18 November 2016

Yari Expression Sheet


I initially started by taking photos of myself with different expressions - i drew over  these to see what shapes those expressions made. I used these draw overs to create some exaggerated cartoon expressions which lead onto the creation of a character expression sheet for my character Yari. This was a really useful exercise as it allowed me to draw her with different expressions from different angles to get a better idea of her character and facial movement,
Share: